A business without a proper invoicing system is massively risky.
Creating invoices and tracking payments is often a struggle for small businesses because there is no system in place. Without the proper paperwork, it is impossible to get paid properly and ensure that your company operates correctly. And spending an accountant or investing in an accounting package isn’t always viable.
However, with a few simple steps in programs you probably already have, you can easily set up a system that works for you. You can use text editors like Microsoft Word to create your quotes and invoices and an Excel spreadsheet to track invoices and payments. This makes life a lot easier, and you don’t have to spend money on any salaries or software.
Steps For Setting Up Your Microsoft Word Invoice Templates
Having a template in place for your invoices is excellent because it saves you a lot of time and boosts your productivity.
Once everything is set up, you need to select the template each time you create a new invoice. You’llYou’ll have a professional invoice that looks good and gives your customers all the information they need to pay you, but you won’t have to spend time on the setup process for every new invoice.
In Microsoft Word, you’ll find a range of invoice templates you can use from their gallery. Alternatively, you can set one up by modifying an existing template or creating one from scratch. Just be sure to save your final design and layout as a new template so that you can access it with ease in the future.
Here’s how to set up your very own invoice template in Word:
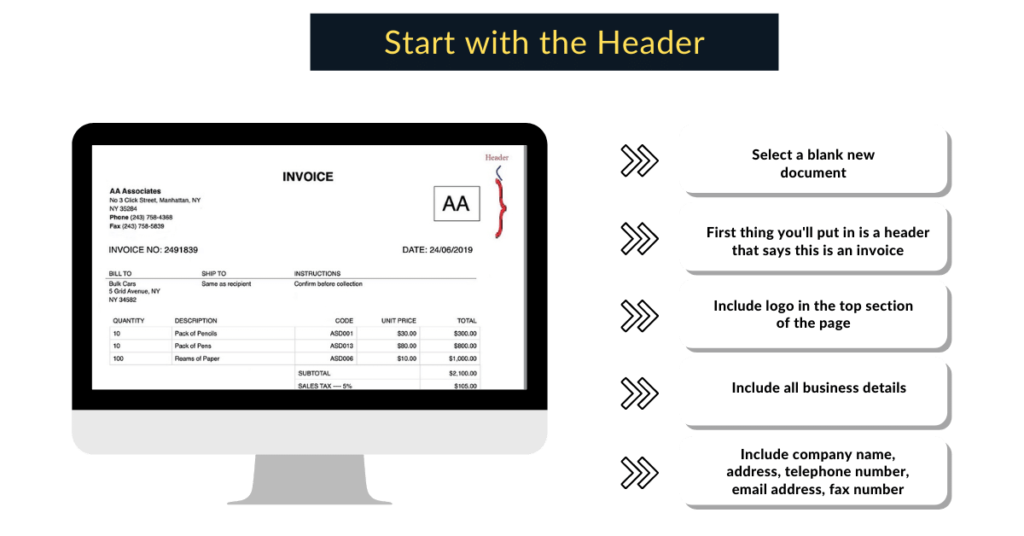
1. Start With The Header
When you open up Word, select a blank new document so that you can put all of your formattings into the paper. The first thing you’ll put in is a header that says this is an invoice, as well as your business details. Many businesses also include their logo in the top section of the page to see who the invoice is from immediately.
It’s common practice to have the main header saying it’s an invoice right at the top of the page, so it’s the first thing the reader sees. Then, you’ll include your business details on the left-hand side—company name, address, telephone number, email address, fax number, and any other relevant information.
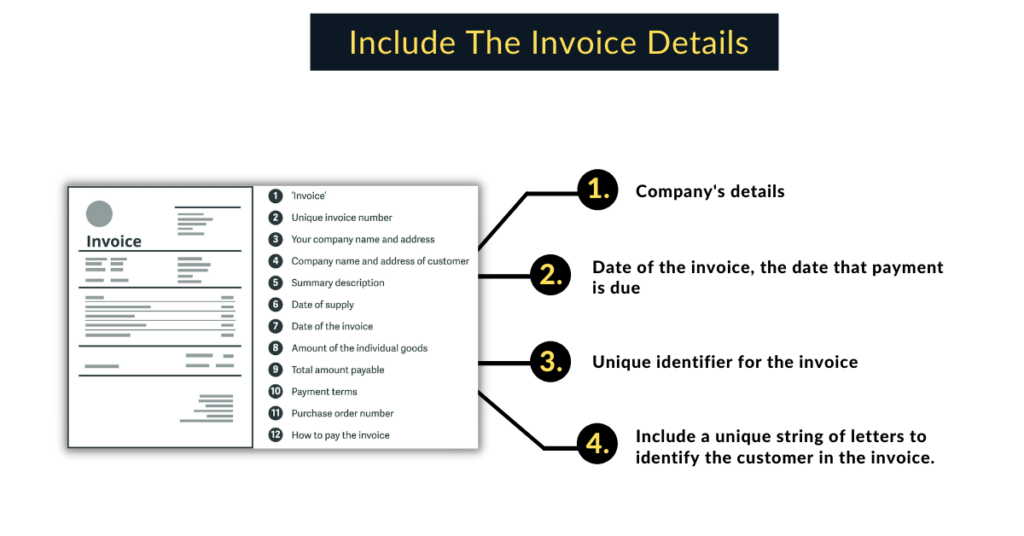
2. Include The Invoice Details
The next step is to include the details for this specific invoice.
This can go directly opposite your company’s details on the right-hand side. Important information to include here is the date of the invoice, the date that payment is due, and a unique identifier for the invoice—you can number your invoices or include a unique string of letters to identify the customer in the invoice.
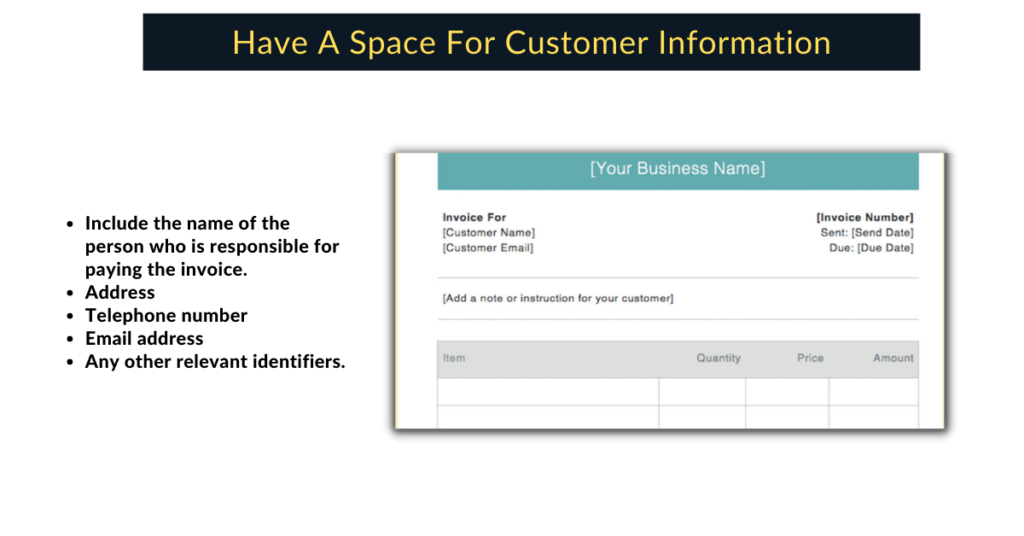
3. Have A Space For Customer Information
Now it’s time to add in the contact information for the person or business paying the invoice.
Your customer information should include the name of the person who is responsible for paying the invoice, as well as their address, telephone number, email address, and any other relevant identifiers.
If you’re invoicing a business, the company name must appear in this section, too, and you should use the business contact information rather than personal information. The person you put down will be the person within the business responsible for making payment or placing the order.
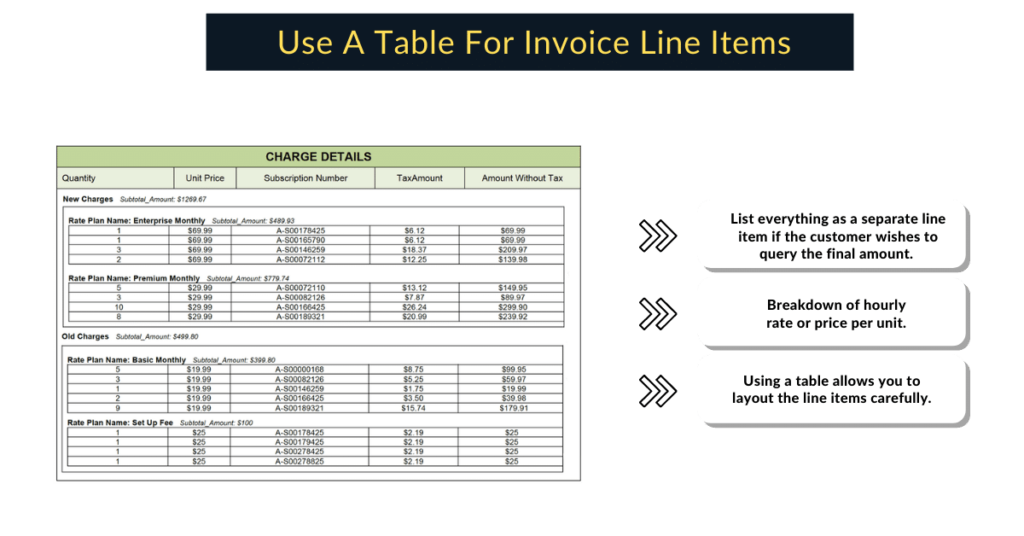
4. Use A Table For Invoice Line Items
The next step, and possibly the most important one, is to list everything the customer is paying for.
Whether selling products or services, you should list everything as a separate line item if the customer wishes to query the final amount. You can include a breakdown of hourly rate or price per unit and show the total number of hours or units bought. The customer can then see exactly how you got to the total at the bottom of the invoice.
Using a table allows you to layout the line items carefully. Your columns should include quantity, product or service description, unit price, and total. It’sIt’s essential to look at your business and what you sell and decide on the best layout for your itemized billing that works for the way you operate.
At the end of the table, there should be several spaces at the bottom of the totals column. The elements usually included are subtotal, taxes, discounts, and the final total.
If you’re working with a deposit, you can add the deposit percentage owed after the final total section. This shows the customer what is due for payment at this stage. When the customer is paying the balance of the invoice, you can add in a section that shows the deposit paid and the total that is still due.
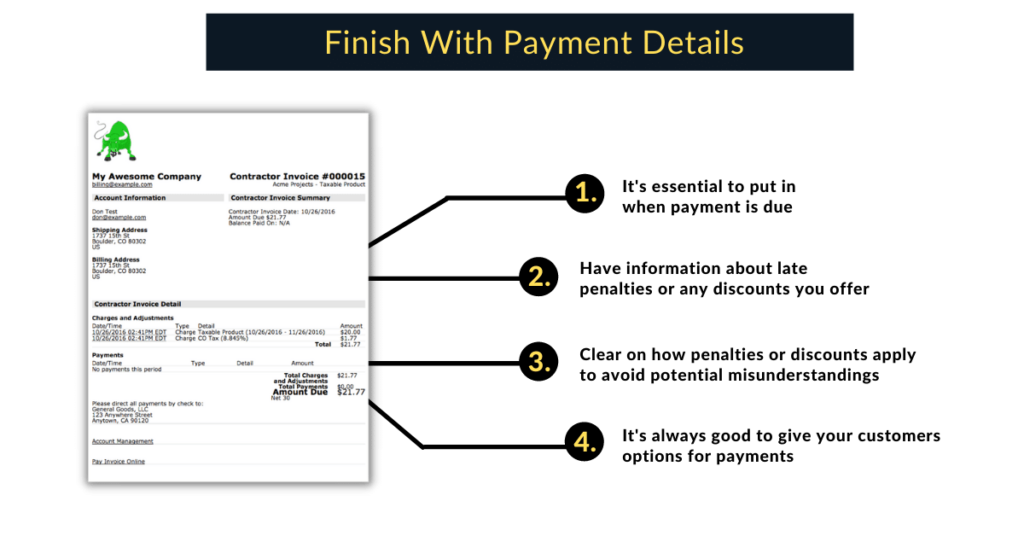
5. Finish With Payment Details
Finally, you need to ensure that you get paid.
It’s essential to put in when payment is due (this should coincide with the due date that you included at the top of the invoice). You can also have information about late penalties or any discounts you offer for early settlement. Just make sure that you are very clear on how penalties or discounts apply to avoid potential misunderstandings
6. The last step is to include how you would like to get paid.
Stipulate if you accept checks, credit cards, direct transfers, cash, Venmo, PayPal, and so on. You can also stipulate any payment options that you explicitly don’t accept. It’s always good to give your customers options for payments, but not too many if they’re going to end up costing you money for each transaction.
Conclusion
Now you have your invoice template Word document, and you can save it for use each time you want to create a new invoice. Remember, it’s best to keep each invoice as a PDF before sending it to your customers. This makes it much safer as there’s no chance of details getting edited, and it’s far more professional too.
Recent Articles
With our in-depth guide, learn more about the DevOps industry. Learn about the culture, practises, technologies, automation, and advantages of DevOps. Immerse yourself with continuous integration, delivery, and monitoring. Learn about successful DevOps…
Discover how online communication, from email to social media, is changing both personal and professional connections by exploring its transformative journey. Discover the breakthroughs and difficulties that lie ahead, from enhancing platform integration…
Use software that enhances the visitor experience to grow your vacation rental business. Improve guest happiness by streamlining check-ins, preventing property damage, and streamlining communication. Learn how automation and intelligent technologies can benefit…
With these 5 game-changing marketing methods, your startup can experience unmatched growth. Learn how customer-focused retention, A/B testing, multi-channel strategies, and data-driven decisions can take your company to new heights. Improve the success…
Unlocking E-Commerce Excellence: Explore the Advantages of OpenCart, a versatile platform for business growth. Learn about customization, extensibility, and real-world success stories. Discover the future of e-commerce with this quick guide.
Innovative online apps created to improve your learning process will open up a world of educational possibilities. These apps revolutionise how you take in information and digest it, from interactive note-taking tools to…